Diy Water Changer
#1
Posted 31 January 2009 - 03:07 PM
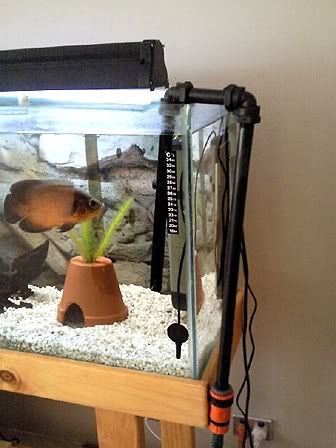
The advantage of this one over other versions:
1. no glue, everything screws or clips together and with some plumbing tape is made watertight, no spills or drops on the floor. No waiting for glue or silicone to set
2. curved bit at the end means when water is pumped back into the tank the water is circulated around the tank.
3. flyscreen at the end means no fry can get sucked out.
4. the screw design allows the arm to be tilted so you can choose how much water will get drained from your tank, without having to be there to monitor.
I've been using this for my large tanks for several months now and I can't imagine living without it. It has made it so much easier - just clip the hose on, water goes out on the lawn and then afterwards clip the hose onto the tap and fill the tank up.
The most expensive bit is the tap that sits between the hose and the pipe. All other parts can be had for a few bucks.
waterchanger.jpg 289.78KB 484 downloads
Example how to change water drain level:
50% drain
waterchanger1.jpg 49.07KB 411 downloads
25% drain
waterchanger2.jpg 88.71KB 434 downloads
#2
Posted 31 January 2009 - 04:06 PM
Got a pic to demonstrate how you adjust the drain height? (I understand the concept but a pic will still be useful for other forum members).
Next question is when are u going to make me one?
Daz
#3
Posted 31 January 2009 - 05:21 PM
#4
Posted 31 January 2009 - 05:28 PM
Have added the drain example now Dazza
Dead easy to put together yourself, don't need me to do it trust me
#5
Posted 31 January 2009 - 10:17 PM
Now can u list all the parts required? Not sure if the Bunnings person will understand "curved bit at the end" LOL
Daz
#6
Posted 31 January 2009 - 10:48 PM
There are 8 parts (not including the valve and the flyscreen)
1 white PVC elbow with threaded end
2 black pipes with thread ends (choose whatever length you want for two of them)
1 black pipe with thread ends - <10cm
2 black elbows with threads
2 different adaptors to convert thread to click for the valve part
plumbing tape (the white thin tape) to make it watertight
Best way is to play around with the parts in the store to see if they all fit together
#7
Posted 01 February 2009 - 07:24 AM
#8
Posted 06 February 2009 - 07:21 AM
#9
Posted 28 February 2009 - 06:15 AM
cheer's mate
neil
#10
Posted 28 February 2009 - 08:30 AM
#11
Posted 12 March 2009 - 02:33 PM
#12
Posted 12 March 2009 - 03:54 PM
i bought a laudry sink type hose from bunnings for the draining part , one big suck gets it started ( hose under 10 bux )
flow is incredibly quick , but i am dumping 300L a week without fail
next modification is drilling a hole throw the wall under the tank and pinching olivers idea and having brass tap-like fittings going throw the wall to the outside , then no more open doors whilst water changes ( fly's mossies etc etc )
will post pic's when done
Cheers
Steve Green
#13
Posted 12 March 2009 - 08:25 PM
What kind of tap is that ? How much is it and where do you get it ?
#14
Posted 12 March 2009 - 09:02 PM
(EDIT by Dazza - I've cleaned up this thread so it remains on-topic with Tim's creation.)
1 user(s) are reading this topic
0 members, 1 guests, 0 anonymous users