Jump to content


Posted Image

PCS & Stuart M. Grant - Cichlid Preservation Fund - Details here


Photo

Werdna's Fish Shed


  • Please log in to reply
36 replies to this topic

#1 werdna

werdna
  • Forum Member
  • Joined: 10-March 07
  • Location: Coogee

Posted 02 April 2011 - 12:11 PM

After 2 years of planning (read procrastination) I finally ordered in my shed.
I decided on 100mm thick coolroom panels, originally was going to be 75mm but the total cost difference was about $300, so decided on the thicker panel.
Originally was going to be 6x3m, but with STUPID council rules I needed to be 1.5m from the fence, so I had to reduce width to 2.5m otherwise it would be too close to the house. (Hence my giving away a coolroom panel a while ago)
So all my internal tank plans got thrown out the window.

Delivery


Day 1. Base down. After drilling and anchoring everything in we did a measurement diagonally across. The measurements were within 1mm. God bless year 10 Trig smile.gif


Day 3. After spending 2 days straight cutting panels we finally finished at 4pm. We decided to put one panel up to see how hard it was.
Then we realised we would have to either take it down, or put the next one up. So I carried over the second panel and we stuck it in place.
45 minutes later, every panel was in place. Amazing how quick these go up.
But I hadnt bought the wall supports yet, so we used the flashing to hold the corners in place.


Finished outside


Running power inside.


I am still in the process of moving tanks inside, namely working up the energy to shift the 8ft.

Progress so far.
6ft rack
Top tank has only just had gravel added so is still a bit cloudy.
Bottom tank will get gravel and rock scaping once I have more tanks ready, so is being used as a fry raiser right now.


3 tier 4ft
EY colony in the middle, other two are housing 7 Bar trio and a Gibbi till the 6ft is ready.


Space for the 8ft


The 8ft to go into above space.
The empty 3ft and sump are going and I will be adding two 4x18x18s down the bottom.
In an attempt to make the move easy, yesterday I built a little trolley to sit the tank on and hopefully it will only take 2 people to move it into place.... Any volunteers? I need two people, as I will be the supervisor tongue.gif


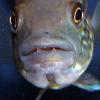
IBC converted to catfish tank.
There is enough driftwood in there to fill three 3ft tanks, and it looks empty.
More driftwood will eventually work its way in there.


From the door looking right.
The IBC is on the back left hand corner.
Next to that is going a bench (getting built one day) which will house fry raisers up top and air pumps, food, accessories etc down the bottom
I am building a 3 tier 3ft rack to go on the right wall, and havent decided what else, probably another 6ft rack at this stage.


Every tank is run off sponge filters or UGF, and I am hoping that with the awesome insulation of the shed I wont need to add heaters to every tank in winter. Time will tell.

Cheers

Andrew

Edited by werdna, 02 April 2011 - 12:12 PM.


#2 dazzabozza

dazzabozza

    Life Member

  • Admin
  • Joined: 16-March 07
  • Location: Beeliar, Perth WA

Posted 02 April 2011 - 12:14 PM

Looks very classy Andrew!

goodjob.gif

#3 smellsfishy

smellsfishy
  • Forum Member
  • Joined: 17-February 09
  • Location: bunbury

Posted 02 April 2011 - 12:23 PM

best fish shed ever! love it!
and such a good idead for the ibc.
keep the picturescoming.
jess.

#4 SIXFOOTLONG

SIXFOOTLONG
  • Forum Member
  • Joined: 21-March 11
  • Location: Wanneroo WA

Posted 02 April 2011 - 12:31 PM

nice one mate !!

#5 Cawdor

Cawdor
  • Admin
  • Joined: 26-December 05
  • Location: Byford

Posted 02 April 2011 - 12:48 PM

Looks very neat and pristine, well done Andrew! Show us some pics of the plumbing etc for water changes pls if you could.

#6 werdna

werdna
  • Forum Member
  • Joined: 10-March 07
  • Location: Coogee

Posted 02 April 2011 - 01:34 PM

Cheers everyone.
Plumbing for water changes? I am currently sticking a leftover bit of the black retic pipe into the tanks and draining into the sandy section behind the shed!
Havent made the self draining plumbing yet.

The black pipe you can see is the airline.
Anyone wondering what to use for airline, use retic pipe, for air line fittings, use the stab in retic parts, you get no air leaks whatsoever and can add air wherever you need it.
I am starting to run out of airpressure though, going to need to upgrade my air pump from an LP40 to something like the LP100 soon.

And I must be doing something right, my peppies spawned last night biggrin.gif

Edited by werdna, 02 April 2011 - 01:35 PM.


#7 Bowdy

Bowdy
  • Forum Member
  • Joined: 21-May 10
  • Location: Parkwood

Posted 02 April 2011 - 01:57 PM

Don't a bloody good job on the shed mate nice work.

#8 Rampage

Rampage
  • PCS Club Member
  • Joined: 10-November 10
  • Location:Viveash
  • Location: Viveash

Posted 02 April 2011 - 02:01 PM

Nice work Andrew, It looks like a great setup.

#9 fourdapostle

fourdapostle
  • Forum Member
  • Joined: 21-November 07
  • Location: Warnbro 6169

Posted 02 April 2011 - 02:17 PM

Onya Andrew, looks pretty good....coolroom panels were a great idea....


#10 werdna

werdna
  • Forum Member
  • Joined: 10-March 07
  • Location: Coogee

Posted 02 April 2011 - 02:29 PM

Cheers guys. I dont see anyone rushing forward to help move the 8ft tho! tongue.gif

Dave I am really impressed with the insulation, on the 38+ degree days we were having in Feb the shed temp never went above 29, and I hadnt fitted the door yet, which is on the north facing wall.
Now all tanks are sitting on 25 degrees.

I got some ideas for a solar radiation heater that I might mount in the door frame in winter if temps get too low.
Hopefully I wont need it, because knowing me it will take 2 hours to build, but I will put it off for 3 years before doing it!

#11 Bowdy

Bowdy
  • Forum Member
  • Joined: 21-May 10
  • Location: Parkwood

Posted 02 April 2011 - 02:34 PM

Hehe I'd give you a hand if you were a bit closer.

#12 Rampage

Rampage
  • PCS Club Member
  • Joined: 10-November 10
  • Location:Viveash
  • Location: Viveash

Posted 02 April 2011 - 02:43 PM

Yeah i would definately have given you a hand but your a bit far away from Sth. Guildford mate.

#13 werdna

werdna
  • Forum Member
  • Joined: 10-March 07
  • Location: Coogee

Posted 02 April 2011 - 02:45 PM

Its cool, I have already roped in someone, it is mainly me now getting off my bum and doing it!


#14 STEVEGREEN

STEVEGREEN
  • Forum Member
  • Joined: 18-September 04
  • Location:behind you
  • Location: Darling Downs

Posted 02 April 2011 - 03:02 PM

outside looks awesome

inside will also when tanks are in tongue.gif

great job mate , i want one

cheers
Steve Green

#15 werdna

werdna
  • Forum Member
  • Joined: 10-March 07
  • Location: Coogee

Posted 02 April 2011 - 03:12 PM

Cheers Steve.
The flashing went up at night with the aid of a torch, some tin snips, a drill and rivets.
I am still amazed at how well it worked!

#16 keenas

keenas
  • Forum Member
  • Joined: 05-February 06
  • Location: Canningvale, Perth WA

Posted 02 April 2011 - 03:19 PM

looks good Andrew. How did you get the IBC in the little door?

#17 werdna

werdna
  • Forum Member
  • Joined: 10-March 07
  • Location: Coogee

Posted 02 April 2011 - 03:29 PM

The door is 820 wide, the IBC tub was cut at 810.
I then stripped the cageapart, put it all in the shed, then bolted it back up again.

#18 zach16

zach16
  • Forum Member
  • Joined: 12-September 10
  • Location: Westminister

Posted 02 April 2011 - 05:36 PM

looks good mate biggrin.gif

#19 spite333

spite333
  • Forum Member
  • Joined: 02-September 09
  • Location: Byford, WA

Posted 03 April 2011 - 09:17 AM

Nice shed Andrew

#20 danotaylor

danotaylor
  • Forum Member
  • Joined: 22-April 10
  • Location: east perth

Posted 03 April 2011 - 12:19 PM

looks fantastic Andrew...any room for seating or purely a functional breeders shed? how are the acuticeps going? any good fortune with fry yet? bless ya mate. Danny


0 user(s) are reading this topic

0 members, 0 guests, 0 anonymous users