Jump to content


Posted Image

PCS & Stuart M. Grant - Cichlid Preservation Fund - Details here


Photo

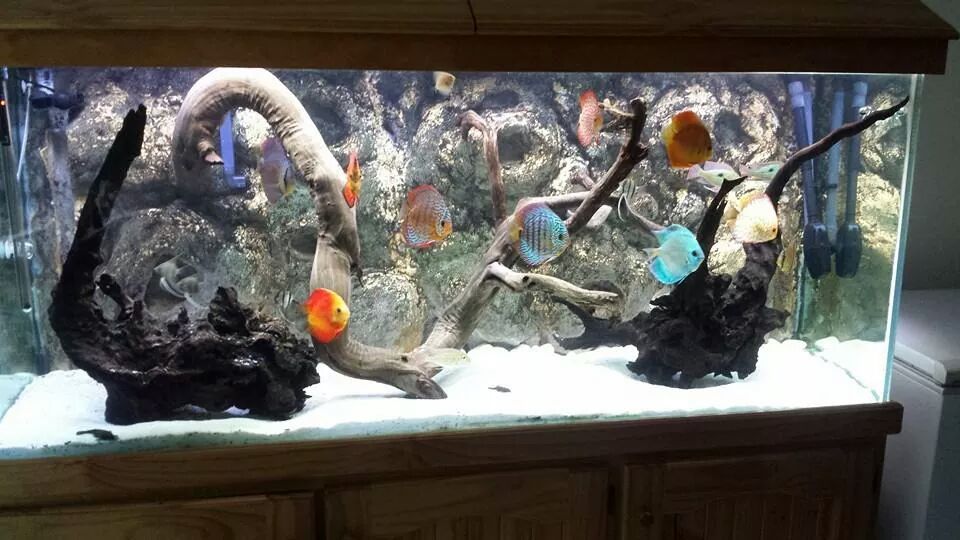
3D Background (First Attempt)


  • Please log in to reply
20 replies to this topic

#1 extend

extend
  • Forum Member
  • Joined: 07-May 09
  • Location: Armadale

Posted 10 November 2014 - 05:57 PM

So I decided to dismantle my planted tank which was not going quite as well as I would have hoped.  I thought back to a meeting where Steve Green demonstrated with great artistry and skill how to construct a 3D background.  


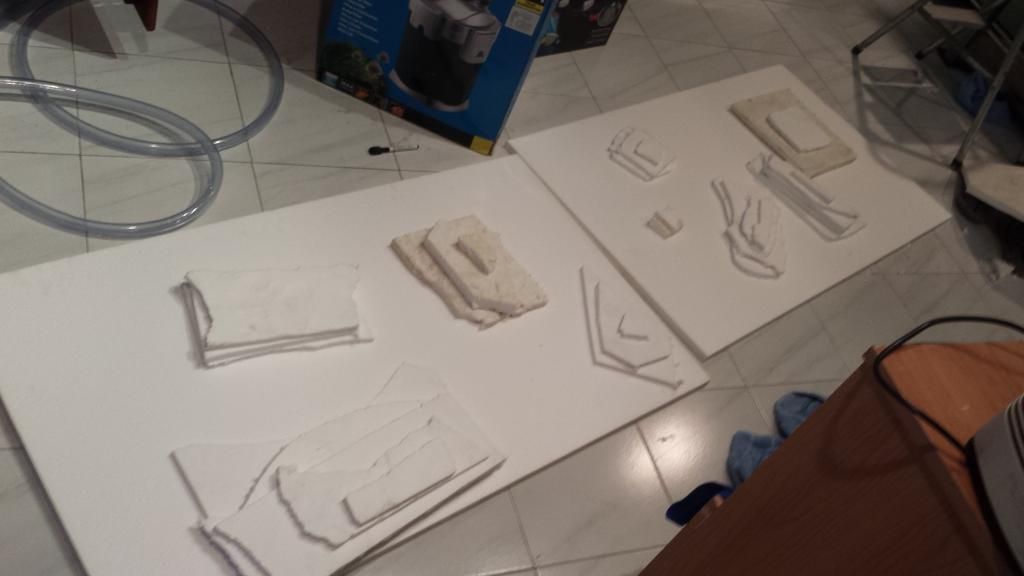
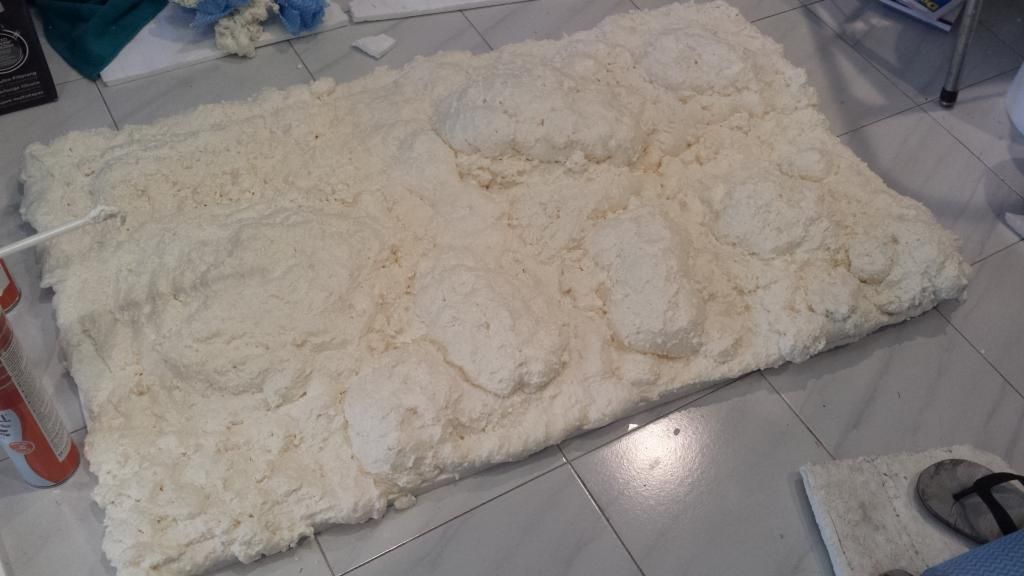
I thought back and remembered all the things he said in the demo and then went and made the thing.  I managed to scab some foam from bunnings and I also bought silicone, expanding foam, oxide coloring in black and an orangie colour at the same time to cover up the fact that I wasn't one of those all take and no give sort of scabs.Bought all the ingredients home and set about sticking pieces of foam on pieces of foam.


I basically filled the gaps between foam pieces with expanda foam and cut it to shape rather than use a blow torch, closer to the Tanganyikan reefs I was modeling it to. 

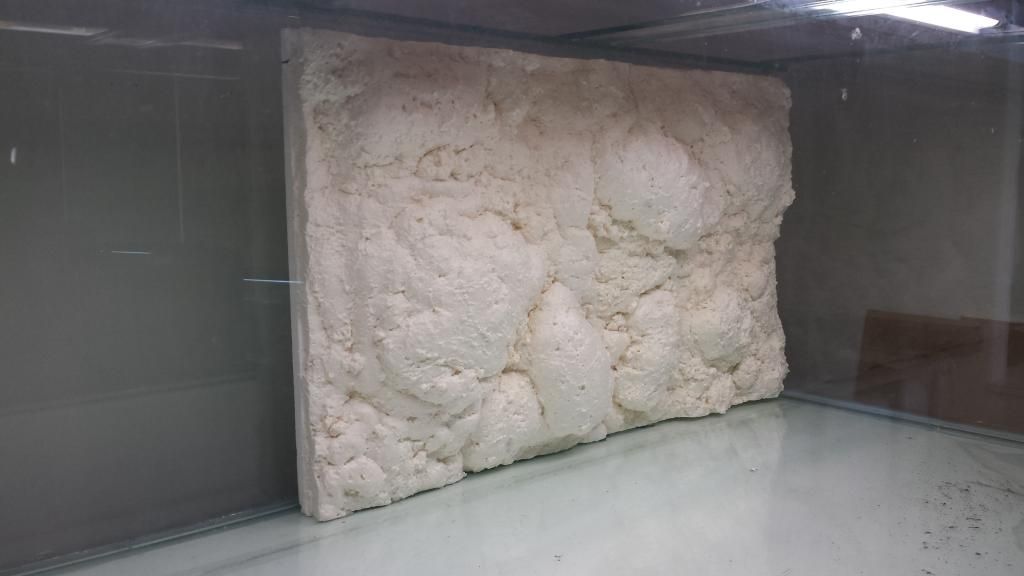
After the foam was cut to a very precise shape (read: random slicings here, there and everywhere) I mixed cement and coloring and proceeded to render the whole thing.


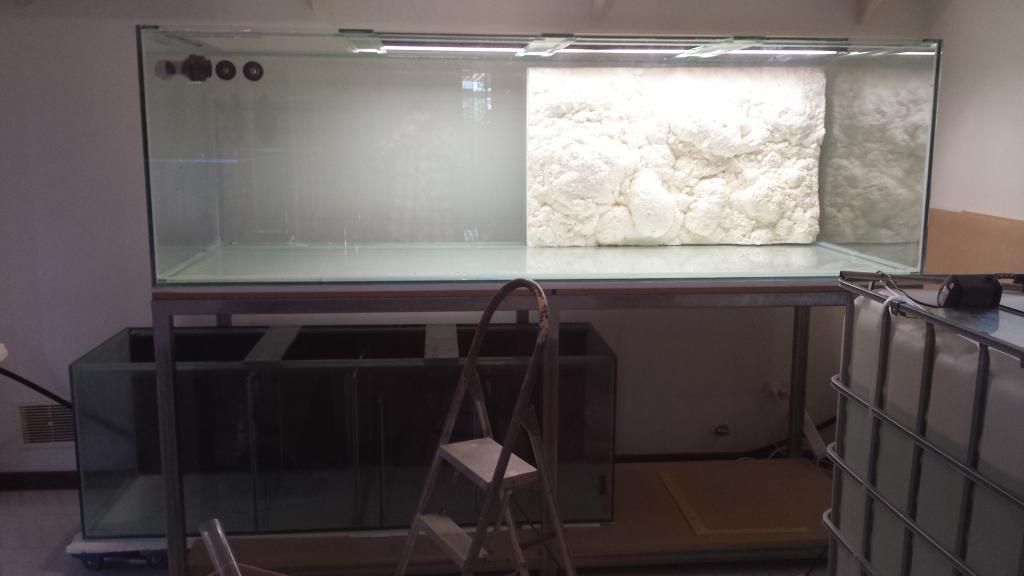
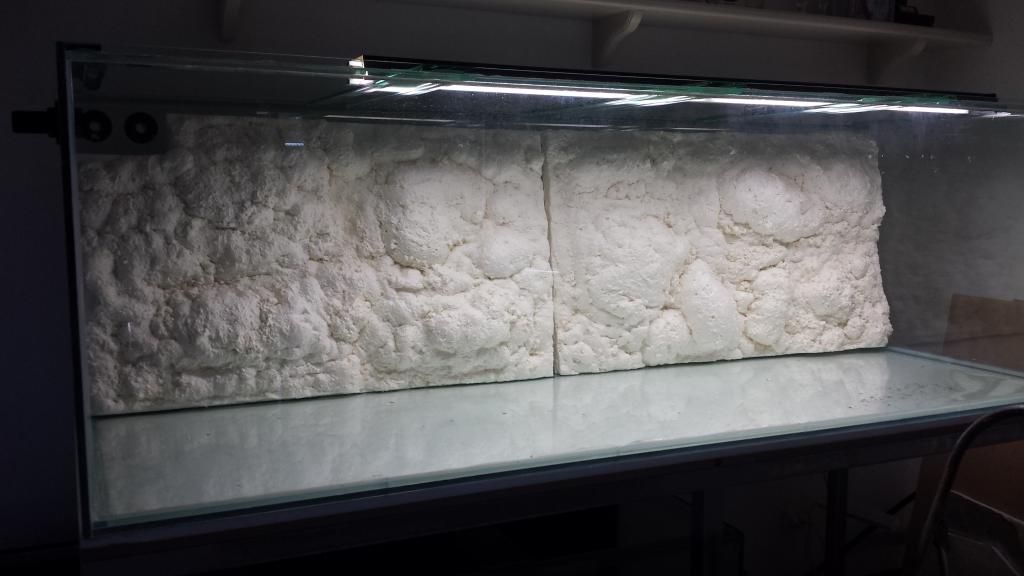
I had to do the main back part in two pieces and join them in the tank.  As you you can see in the full tank shot at the bottom left was going to be a void for the heater but silly me went and added more foam to the top of the tank just under the spray bar and covered up the hole where the heater lead was going to come up behind, now the heater is pushed right in the very right hand corner.  


All in all a pretty dodgy end product, lots of small pieces of foam I missed with the render (which is what happens when you do things at night under the patio lights)  if you look at it closely. These are things that will improve when i make my next one.  


Attached File  20141027_205435 (1024x576).jpg   334.54KB   9 downloads

Attached File  20141027_205500 (576x1024).jpg   315.86KB   9 downloads

Attached File  20141110_170414 (1024x576).jpg   296.92KB   9 downloads


note photos taken with camera phone in case you were wondering


#2 Riggers

Riggers
  • Forum Member
  • Joined: 27-November 10
  • Location: Kingsley

Posted 10 November 2014 - 09:08 PM

Really nice job mate!! Looks very natural :)

#3 Mattymak

Mattymak
  • Forum Member
  • Joined: 20-February 12
  • Location:Marangaroo
  • Location: Perth, Australia

Posted 10 November 2014 - 10:54 PM

Very nice mate! Well done.

#4 dicky7

dicky7
  • Forum Member
  • Joined: 25-October 13
  • Location:Perth
  • Location: Noranda

Posted 10 November 2014 - 11:53 PM

you are too hard on yourself mate  that is an awesome job :)


#5 extend

extend
  • Forum Member
  • Joined: 07-May 09
  • Location: Armadale

Posted 11 November 2014 - 06:07 PM

Ha ha maybe a little.  Anyway I know how i will hide things better next time I make one and learn to do things during daylight hours so I can see things better.


#6 MattyB

MattyB
  • Forum Member
  • Joined: 21-February 14
  • Location: Hillman

Posted 11 November 2014 - 06:20 PM

good job mate, I will be attempting to make a 8x2.5ft background for my tank next week :)


#7 extend

extend
  • Forum Member
  • Joined: 07-May 09
  • Location: Armadale

Posted 11 November 2014 - 10:28 PM

that's going to be a fun challenge Matty.  look forward to seeing the result.


#8 Riggers

Riggers
  • Forum Member
  • Joined: 27-November 10
  • Location: Kingsley

Posted 12 November 2014 - 09:33 AM

Need styro Matty? I've got heaps

#9 STEVEGREEN

STEVEGREEN
  • Forum Member
  • Joined: 18-September 04
  • Location:behind you
  • Location: Darling Downs

Posted 18 November 2014 - 10:56 PM

that looks great , i know i would never do another one :)


#10 MattyB

MattyB
  • Forum Member
  • Joined: 21-February 14
  • Location: Hillman

Posted 19 November 2014 - 04:26 PM

where you located Riggers :) I just went out and bought the back board piece but will still need a heap more :) Cheers


#11 Riggers

Riggers
  • Forum Member
  • Joined: 27-November 10
  • Location: Kingsley

Posted 19 November 2014 - 10:20 PM

I'm northern suburbs bro, Kingsley, I've got some larger sheets and a bunch of strips and odd shapes you're welcome to it :)

#12 MattyB

MattyB
  • Forum Member
  • Joined: 21-February 14
  • Location: Hillman

Posted 20 November 2014 - 06:53 AM

dam your an hour away from me lol im SOR in rockingham :S


#13 Dr Cucumber

Dr Cucumber
  • Forum Member
  • Joined: 24-January 04
  • Location: Duncraig

Posted 20 November 2014 - 07:14 AM

That looks pretty good for a first attempt. I've always been tempted to try it myself.

#14 Riggers

Riggers
  • Forum Member
  • Joined: 27-November 10
  • Location: Kingsley

Posted 20 November 2014 - 09:13 AM

dam your an hour away from me lol im SOR in rockingham :S


I often head down that way, I've got a beach house just outside Rockingham.. I can throw some in the car and let you know when I'm headed that way next :)

#15 MattyB

MattyB
  • Forum Member
  • Joined: 21-February 14
  • Location: Hillman

Posted 03 December 2014 - 09:21 PM

Cheers mate but I just used some old stuff :) here is my first attempt so far, im getting there, still need to colour, coat and seal. its a 8x2.5ft background. im lucky I can get away with 2 pieces since the tank is 3ft deep :) trying to copy my old 6x2x2.5 discus tank


20141123_214828_zpsbe997d70.jpg


half dry in this pic

20141125_133623_zps130e921c.jpg


20141130_103139_zps6d0e8fda.jpg


20141130_103059_zpsc6eb9b0d.jpg


20141130_103616_zps3994abee.jpg


still a work in progress. hopefully in the end should look like this


IMG_31565300308318_zpsb8ee461e.jpeg


#16 extend

extend
  • Forum Member
  • Joined: 07-May 09
  • Location: Armadale

Posted 04 December 2014 - 01:25 PM

Looking pretty rad. What kind of color are you going for. You can have the rest of my oxide colouring you want, I have heaps left.

#17 MattyB

MattyB
  • Forum Member
  • Joined: 21-February 14
  • Location: Hillman

Posted 04 December 2014 - 01:45 PM

Thanks extend but no thanks :) im just going to be using spray paint, then when its dried and cured im going to completely cover with a pond sealer, do a good few coats so than nothing will leach, than after that im getting some fake greenery to go on the background to act like a vine going across the background. see how it goes 


#18 werdna

werdna
  • Forum Member
  • Joined: 10-March 07
  • Location: Coogee

Posted 04 December 2014 - 03:23 PM

Red oxide in a fish tank?!


What a waste of perfectly good rocket fuel f_tekcor.gif


#19 MattyB

MattyB
  • Forum Member
  • Joined: 21-February 14
  • Location: Hillman

Posted 05 December 2014 - 10:59 AM

haha ^


had to ditch my idea, going back to having a coat of cement over it, needs the strength.


#20 extend

extend
  • Forum Member
  • Joined: 07-May 09
  • Location: Armadale

Posted 10 December 2014 - 09:09 PM

What pond sealer were you going to use?  Crommelins from Bunnings is a total waste of time, probably the biggest waste of money.  It turned a milky colour on my background in various spots and Im pretty sure it has all come off as there are no milky coloured patches left.  Anyway if you still want some oxide colouring to mix with cement lemme know. 


0 user(s) are reading this topic

0 members, 0 guests, 0 anonymous users