


My Fish Shed (update 12/03/2013)
Started by slink, Feb 18 2013 08:47 PM
62 replies to this topic
#41
: post #41")
Bowdy
-

- Forum Member Joined: 21-May 10
-
Location: Parkwood
Posted 27 February 2013 - 05:57 PM
Mattt is spot on exactly what I was going to put together and show you
#42
slink
-
- Forum Member Joined: 10-September 07
-
Location: Aveley
Posted 27 February 2013 - 06:08 PM
Yeah that's what I was thinking as well so hopefully this weekend I can get it done.
#43
scotty81
-

- Forum Member Joined: 24-July 10
- Location:Mandurah
-
Location: Lakelands
Posted 09 March 2013 - 06:14 PM
Any updates?
#44
slink
-
- Forum Member Joined: 10-September 07
-
Location: Aveley
Posted 09 March 2013 - 10:09 PM
Hi Scotty I have been flat out with the shed lately I will take some more pictures tomorrow
#45
mattt
-

- Forum Member Joined: 10-November 09
-
Location: Craigie
Posted 09 March 2013 - 11:00 PM
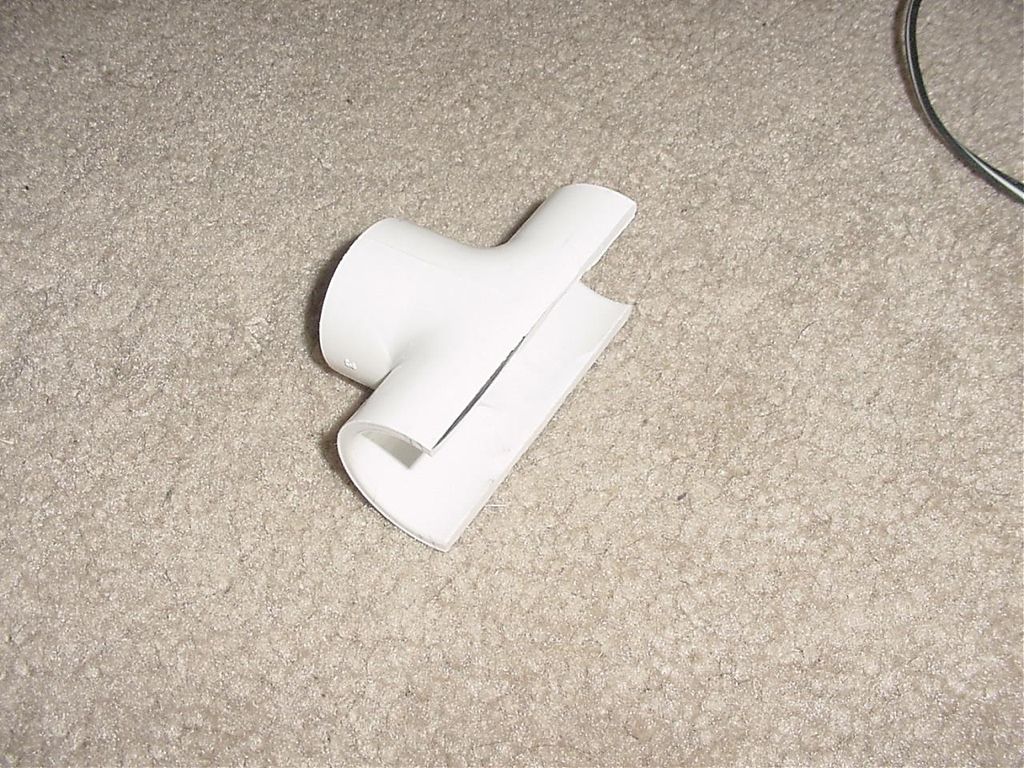
If you have already done all the pipe work these may be handy, you glue and snap them on, then drill out the tee. 
#46
slink
-
- Forum Member Joined: 10-September 07
-
Location: Aveley
Posted 12 March 2013 - 07:56 PM
Okay so a bit of an update
I have been flat out the last couple of weeks with completing the shed and work.
So after my initial set up I was going to run PVC and run the airlines for the sponge filters directly off that but after a couple of days it wasn't working as I wanted it to. After some good advice from you guys I did decide to change it to PVC with poly pipe running off that.
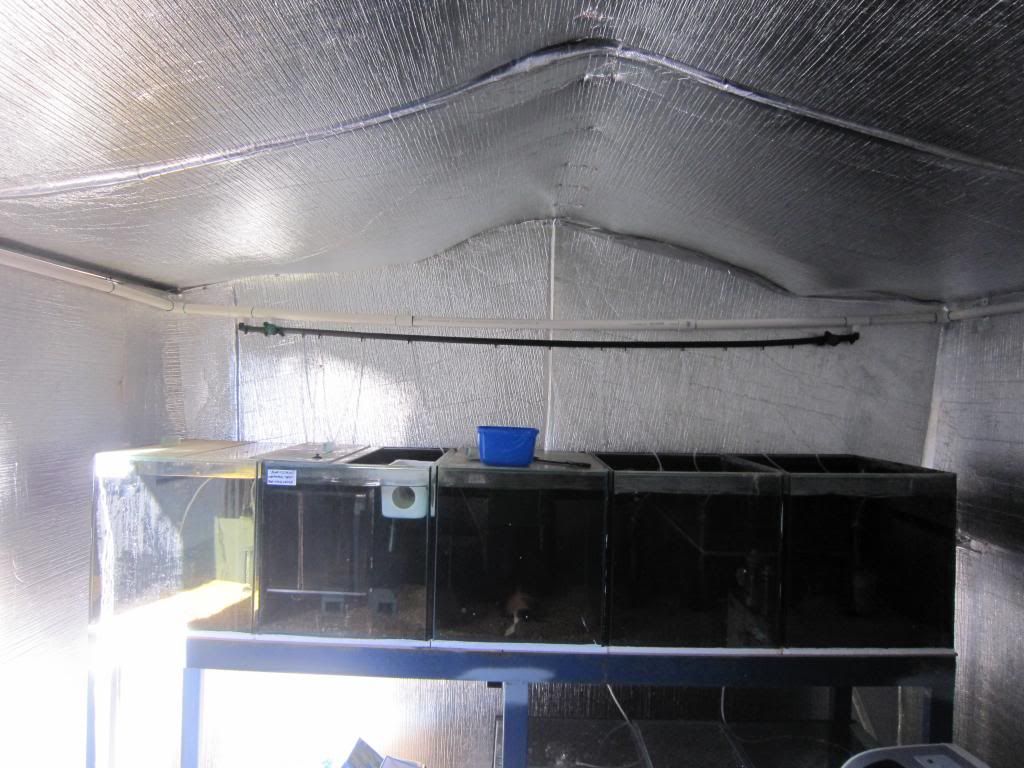
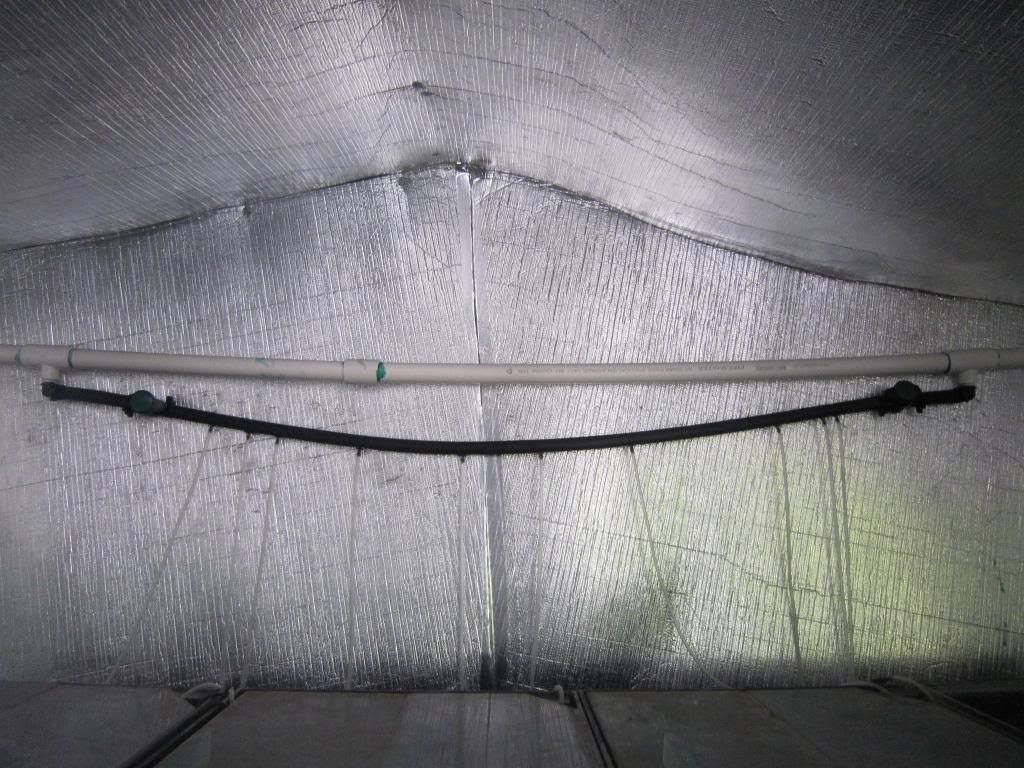
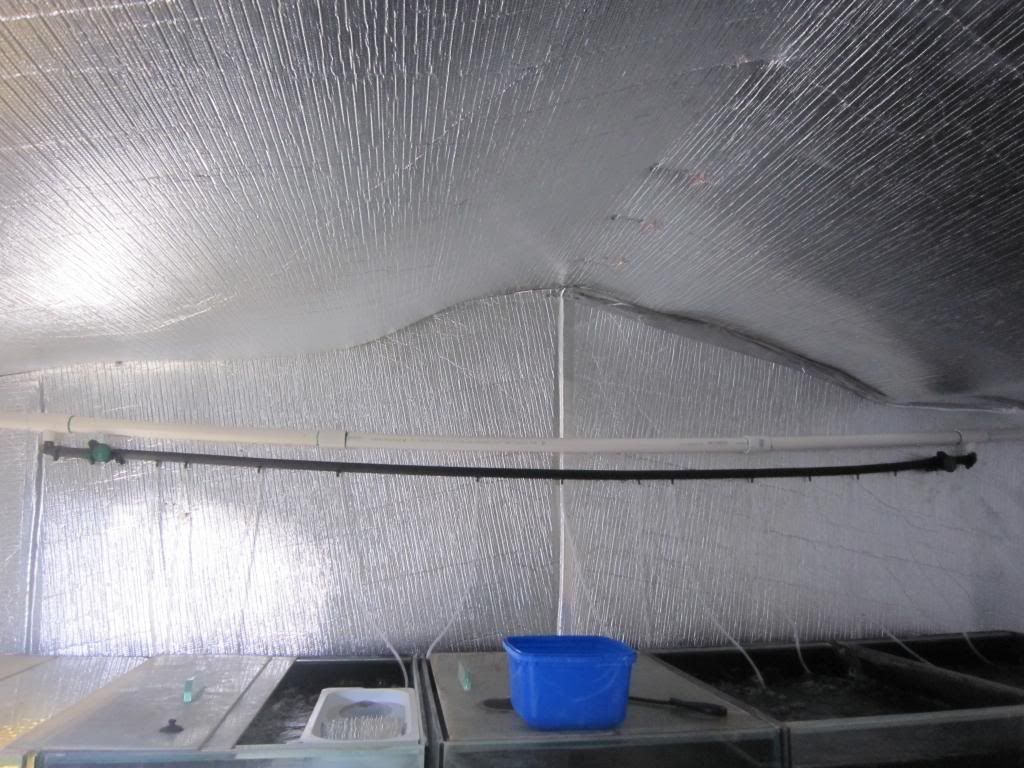
I'm glad that I went this way because it makes it 100x easier to just place another line in if I need it and it is also air tight which is even better.
Another advantage is that I have more control in which lines get more or less air flow with the taps
So most of the tanks are in now just have a few more spots for a couple of 3 footers
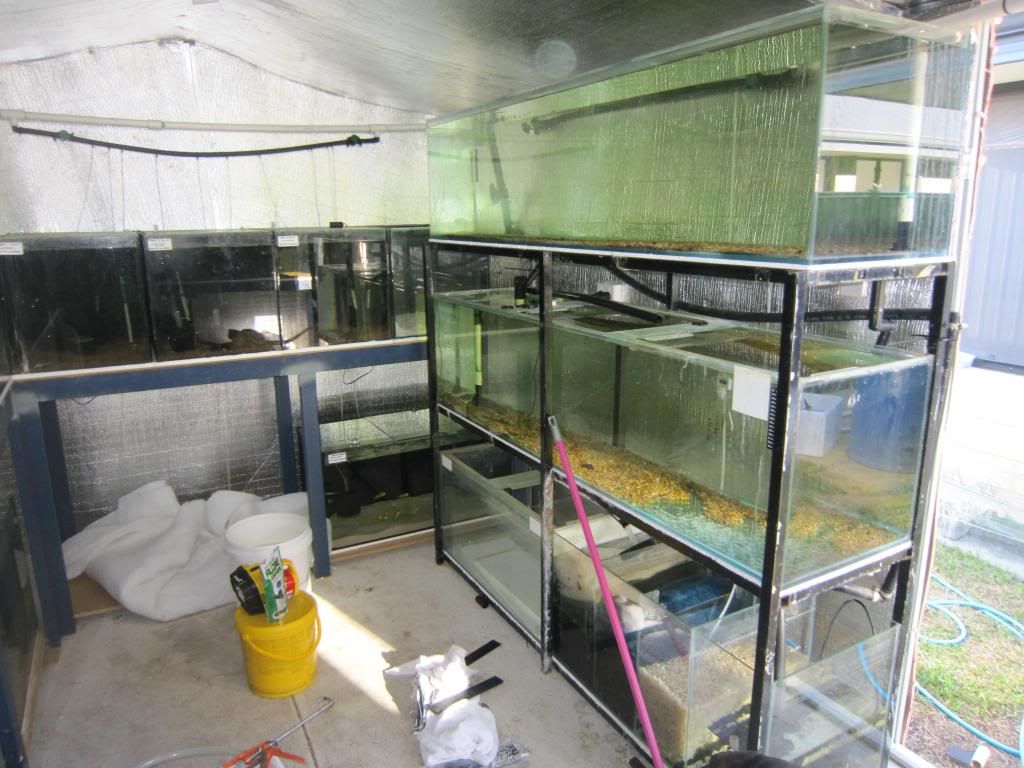
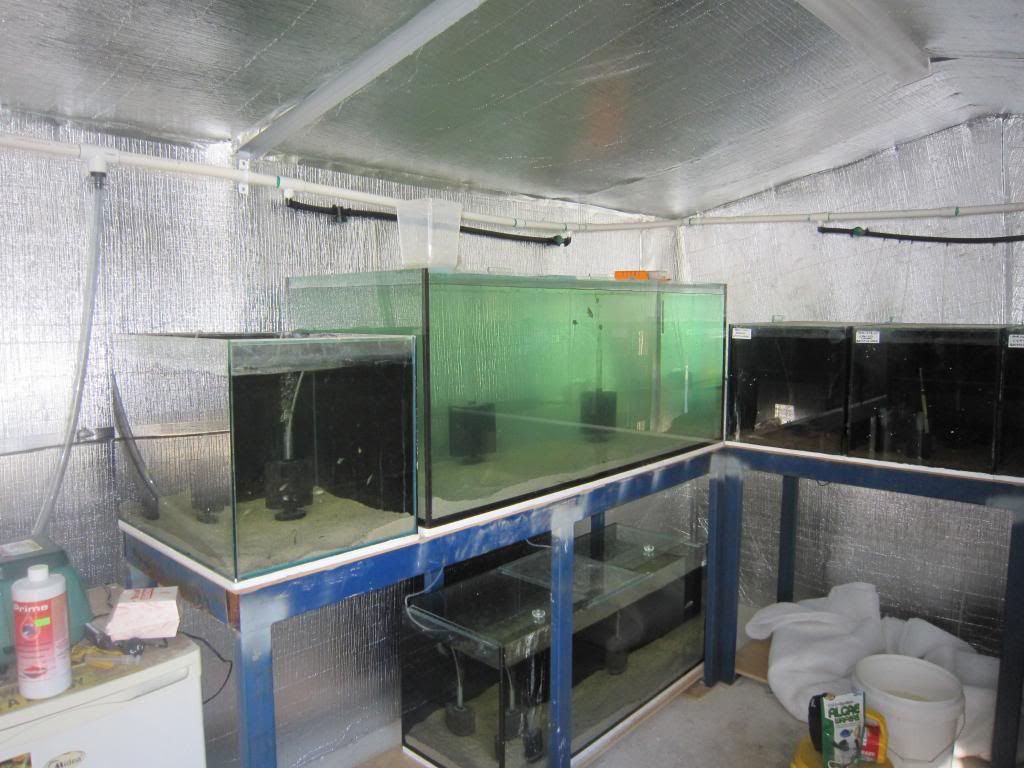
Temperature of the shed I am very happy with tanks are sitting at 26 with out having to use the air conditioner to much. I am keeping an eye on them on the cooler nights we are having but seems to keep its heat not too bad at all.
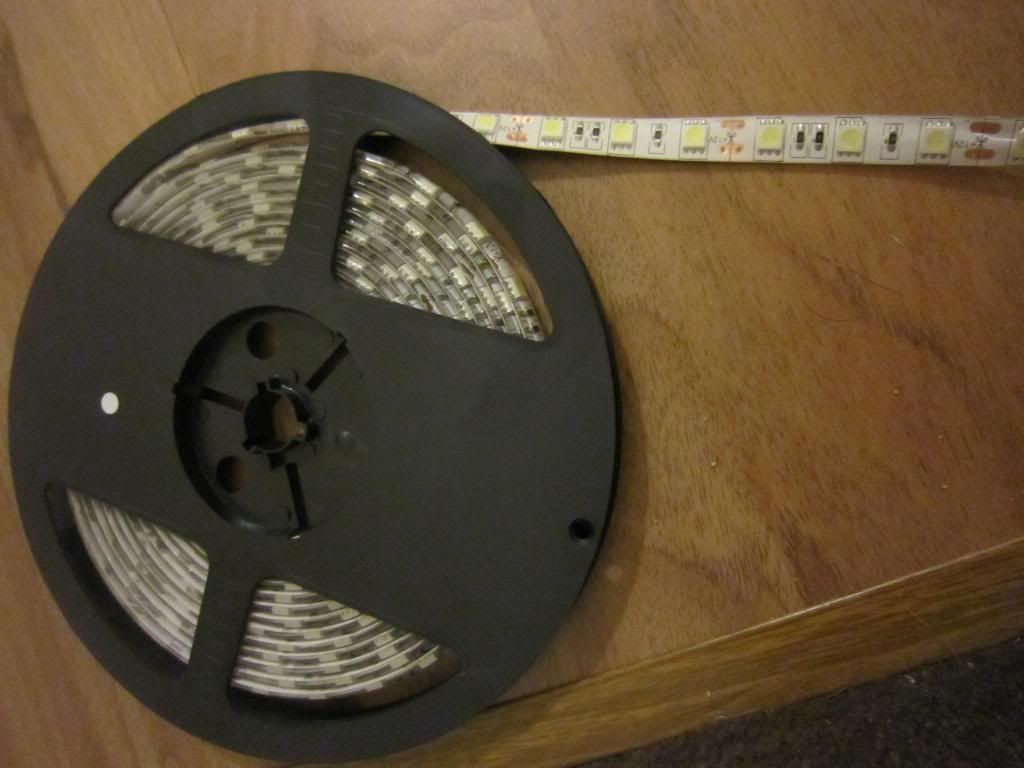
My next issue is lighting for the tanks I am going to be using the LED light strips to try and save a little money on the power bill but I have come up with a bit of a problem. I'm trying to work out what I am going to stick them to for the top tanks, the bottom tanks are easy because I can just stick them to the stands.
So any help on what I can do for the top tanks would be great I have a photo of the LED strips I am using.
I have been flat out the last couple of weeks with completing the shed and work.
So after my initial set up I was going to run PVC and run the airlines for the sponge filters directly off that but after a couple of days it wasn't working as I wanted it to. After some good advice from you guys I did decide to change it to PVC with poly pipe running off that.
I'm glad that I went this way because it makes it 100x easier to just place another line in if I need it and it is also air tight which is even better.
Another advantage is that I have more control in which lines get more or less air flow with the taps
So most of the tanks are in now just have a few more spots for a couple of 3 footers
Temperature of the shed I am very happy with tanks are sitting at 26 with out having to use the air conditioner to much. I am keeping an eye on them on the cooler nights we are having but seems to keep its heat not too bad at all.
My next issue is lighting for the tanks I am going to be using the LED light strips to try and save a little money on the power bill but I have come up with a bit of a problem. I'm trying to work out what I am going to stick them to for the top tanks, the bottom tanks are easy because I can just stick them to the stands.
So any help on what I can do for the top tanks would be great I have a photo of the LED strips I am using.
#47
Departure
-

- Forum Member Joined: 27-November 12
-
Location: seville grove
Posted 12 March 2013 - 08:47 PM
The led lighting looks extremly light in weight, maybe some aluminum flat bar bent at 90 degree each end and grub screwed to each end of the tank
#48
slink
-
- Forum Member Joined: 10-September 07
-
Location: Aveley
Posted 25 March 2013 - 05:16 PM
Cheers departure I am hoping to make it one continuous light instead of individual lights if any one has any other ideas that would be great.
#49
dazzabozza
-

- Admin
-
 Joined: 16-March 07
Life Member
-
Location: Beeliar, Perth WA
Posted 25 March 2013 - 09:57 PM
U could still do Departure's idea and then continue onto the next tank and keep the strip continuous yeah? Else go for an ali strip across the entire length of the shed?
Mine was a clear rope that I just rested on top of the cover glass for my top rows. The rope gave some water resistance though. Not sure how resistant your strips are?
Mine was a clear rope that I just rested on top of the cover glass for my top rows. The rope gave some water resistance though. Not sure how resistant your strips are?
#50
Alex Hill
-

- Forum Member Joined: 31-January 12
Posted 25 March 2013 - 10:31 PM
The strip looks like the type they sell for boat lighting. In that case it is 100% waterproof, unless you cut the strip, in which case you need to seal the end again.
From experience, those strips are a bugger to cut and solder wires on to, so I would recommend keeping it as continuous as possible.
From experience, those strips are a bugger to cut and solder wires on to, so I would recommend keeping it as continuous as possible.
#51
slink
-
- Forum Member Joined: 10-September 07
-
Location: Aveley
Posted 26 March 2013 - 06:02 AM
Cheers daz I'm trying to think how that would work I was hoping to have the lights in a way that I didn't need to remove them if I had to do something with the tanks. Alex yes they say 100% water proof the guy said to make sure to heat shrink any joints
#52
Departure
-
- Forum Member Joined: 27-November 12
-
Location: seville grove
Posted 26 March 2013 - 12:39 PM
Then instead of connecting to each side of the tank just connect to the end of your fish stand frame, this will allow you to have one long continues light, good thing about light gauge flatbar is that its easy to bend in the shape/direction you need. Looks like black fish stand wont be a problem for you, and im guessing its just the blue stand that is your main concern.
Edited by Departure, 26 March 2013 - 12:42 PM.
#53
slink
-
- Forum Member Joined: 10-September 07
-
Location: Aveley
Posted 26 March 2013 - 01:19 PM
Yes I was planning on connecting them to the stands the only issue I have found with flat bar is it sagging to I was going to use square tube instead I think.
#54
Departure
-
- Forum Member Joined: 27-November 12
-
Location: seville grove
Posted 26 March 2013 - 02:02 PM
yeap that will work, hopefully you have welding machine or know someone who does to make it nice, otherwise angle iron will also stop the sagging
#55
werdna
-
- Forum Member Joined: 10-March 07
-
Location: Coogee
Posted 26 March 2013 - 02:07 PM
What about Ali channel?
It is lighter so can be smaller gauge without sagging and doesn't rust.
And will remove any heat from the LEDs, not that you should get much...
It is lighter so can be smaller gauge without sagging and doesn't rust.
And will remove any heat from the LEDs, not that you should get much...
#56
slink
-
- Forum Member Joined: 10-September 07
-
Location: Aveley
Posted 26 March 2013 - 02:44 PM
Ali channel could be the go. Any good places to get it?
#57
MadDocker
-

- Forum Member Joined: 06-September 11
-
Location: Byford
#58
werdna
-
- Forum Member Joined: 10-March 07
-
Location: Coogee
Posted 26 March 2013 - 03:16 PM
If you are only after a couple of short lengths, I go to Bunnings, a scrap yard.
Large order go to One Steel Ali (don't know if they are still doing public...)
If you want it to look pretty but cost a bit more, order profiles.
Large order go to One Steel Ali (don't know if they are still doing public...)
If you want it to look pretty but cost a bit more, order profiles.
#59
slink
-
- Forum Member Joined: 10-September 07
-
Location: Aveley
Posted 15 April 2013 - 10:33 AM
So a bit of an update haven't got anymore photo's as yet but will try and update is the next couple of weeks. I have had to upgrade my air pump as my old one wasn't quite doing the job only thing now is I think it maybe a little too much so how would I bleed the extra out? also got most of the LED's working now only a few more to go when I get them sorted I will post up some photo's
#60
Bowdy
-
- Forum Member Joined: 21-May 10
-
Location: Parkwood
Posted 15 April 2013 - 12:00 PM
Throw a T inline man and screw a tap in.
If use a threaded snap T. No cutting just glue it snap it on wait couple days and drill the centre and screw your tap in.
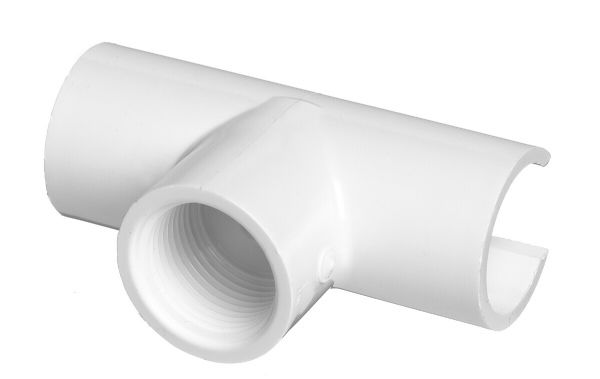
If use a threaded snap T. No cutting just glue it snap it on wait couple days and drill the centre and screw your tap in.


0 user(s) are reading this topic
0 members, 0 guests, 0 anonymous users

