**Pics resized **
Hi All,
Thought I'd share my new 6x2x2 build I've been working the last 2 months bit of a time line below 
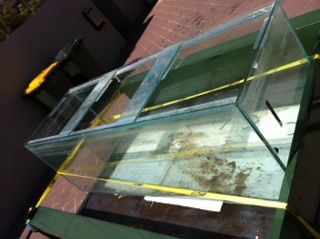
1. I think luck was on my side this day I was dumping some rubbish down the tip went into the tip shop and someone just dropped of a this 6x2x2 into the the tip shop, I asked how much they wanted and said $30 !! So pretty much straight into the trailer and to home for a test fill.
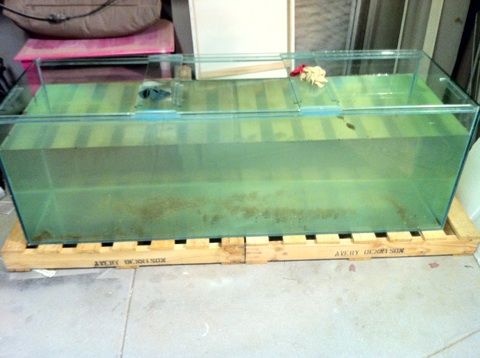
2. The Test Fill... after a bit of a clean found bugger all scratch's so filled her up... pray'd and let it sit for a month full of water... this was a condition from the Mrs before I was allowed to bring it inside... Happy Days no leaks
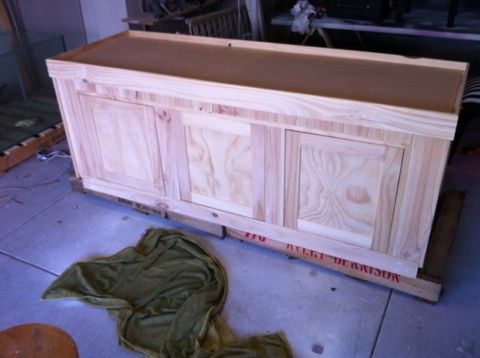
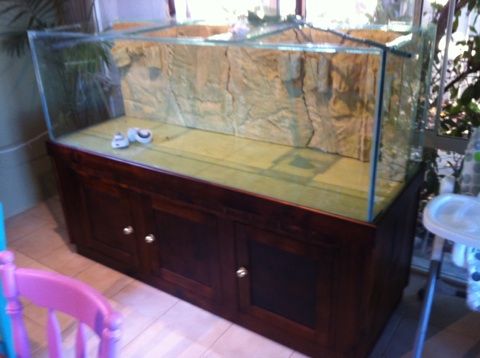
3. The Cabinet... My Father in-law built this from scatch for me, stunning job, he's a civil engineer so pretty much over engineered the frame,
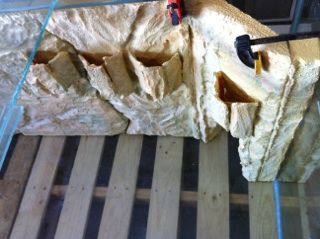
4. Back ground time... I did so much research into DIY back ground... eventually went for foam, Clark rubber have 5x2x2 pieces about 6cm thick. The process pretty much went like this.
a. Cut into 4 segments and make the edges kind of jaggered so looks a bit more natural rock like
b. I used a steak knife to cut out some of the larger holes and crack lines.
c. I used a lighter to melt and and texture, it also made the shapes a little more random... defo wear a mask so your not breathing any nasty chems.
d. I was really inspired by some of those riparium tanks I've seen on youtube so I also added a few planters into the back ground, I did this by using some small 15cm square plastic pots siliconed foam to it and then randomized the shape using the same methods as above.
e. I used Cromlins Sandstone pond sealant over all sides of the foam x3 coats all up it took a 1lt tub to do this.
f. I used a mixture of different coloured paints, red, green, blue and randomly dry brushed it on to give a kind of mixed color effect.
g. I used Cromlins Clear pond sealant to seal all the added colors x2 coats and have loads left from a 1lt.
h. Use aquarium sealant to glue it to the glass... dont be shy as its foam its really going to want to pull away more the better.
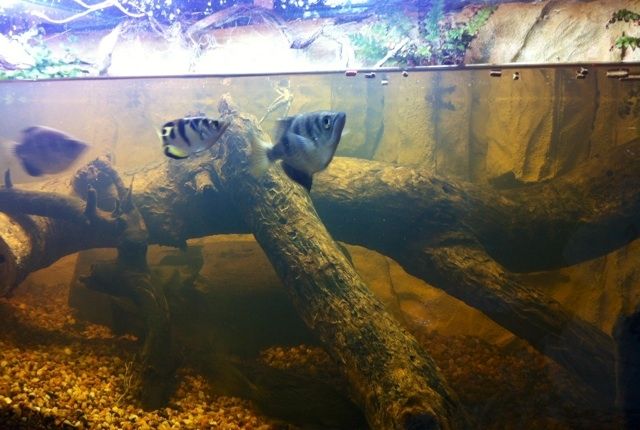
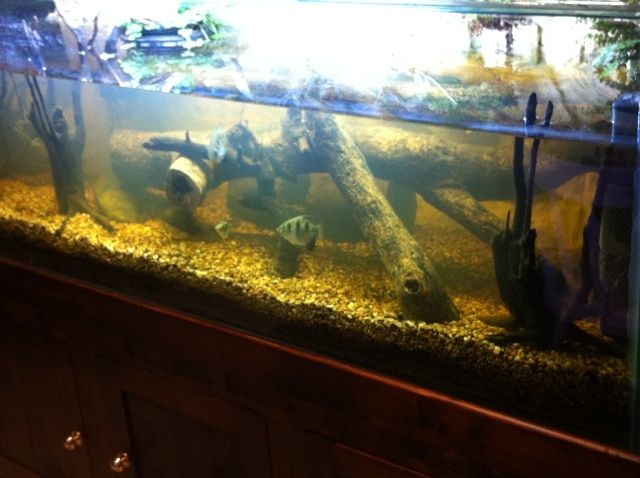
Below is the wall shot... you can see the planters and a cave I put in this is were the water heater and water output will be.
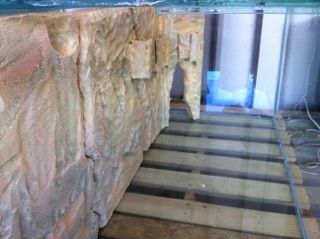
When I was using the silicone I used clamps to hold it in place for a few hours to get a good hold I only had 2 so had to do 1 at a time and then move on.... This corner cave forms a triangle shape around 20cm x 20cm x 20cm I wanted it nice and big to allow water flow plus if I need to get my arms in there to adjust anything.
Talk about a misson to get this bugger inside the base is heavier than the tank its self... For stain choice I used a Walnut oil rub I did about 3 coats of this to get a nice deep color then a coat of Walnut Stain / Varnish rubbed it all down with 240 grade sand paper to get it nice and smooth then another last coat of Stain / Varnish.
While I was staining Im glad I had the for sight to glue carpet to the feet on the stand so we could slide it with the tank on across the tiles.
Below are two short Vids of the tank just added fish I still need to add plants something ease like Vas down the bottom... Im not.sure yet for the top planters but I did make my own soil and mineralise it there is also approx 2inchs of avon river pebbles to stop the dirt going through the water... its a tad murky at the moment as I had added a pile of wood, I've a internal filter to help speed the process.
http://www.youtube.c...h?v=UVDapTwq73E
http://www.youtube.c...h?v=ImEYnanVp7U
Equipment running:
Eheim 2217
300watt water heater
18watt UV clarifier
Fogger / Mister - in the future once the lid has been built.
Fish:
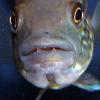
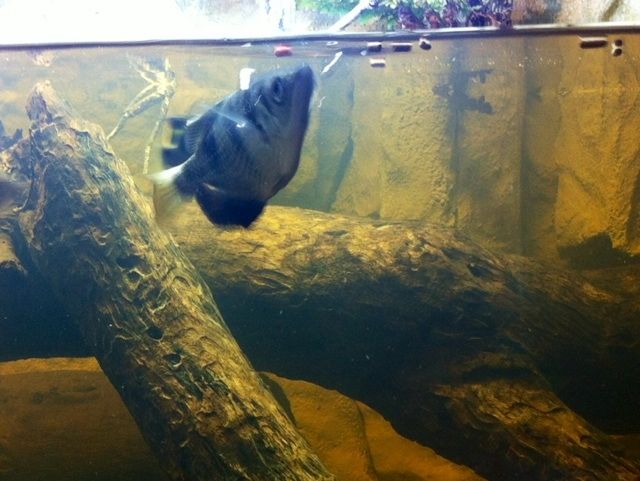
x3 Archers
x1 Salmon Tail Cat Fish
x2 Feather fins
Im trying for mostly native's (feather fins excluded)...
Other fish Im going to add
x3 more archers
x2 red tail scats
x1 Sara lei
Edited by MattB, 24 February 2014 - 04:08 PM.