


 This topic is locked
by Chris Greenwood.
Just thought I would post some images of a DIY background I put together six months ago on a Tang. display tank. If you have any questions please do not hesitate to ask.
I realise that this is not too different from other plans on the web, however, this was done using local materials.
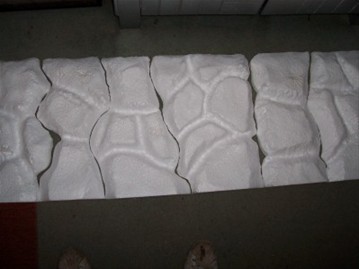
Stage 1
Using a 50mm thick block of styrofoam I carved out the rock shapes using a screwdriver and then applied a heat gun to the surface to smooth out the foam.
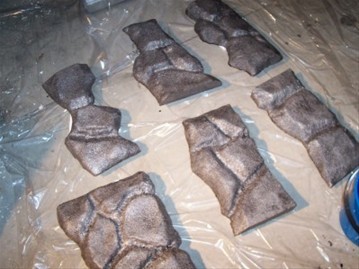
Stage 2
Using an epoxy resin to which I added some black oxide, I applied a single coat. The oxide provided some colour to the resin so I could be sure I was covering the entire surface.
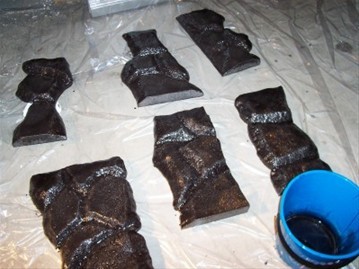
Stage 3
Second coat of coloured epoxy resin was applied.
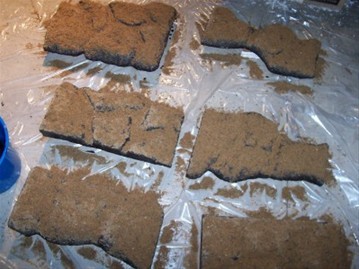
Stage 4
Before the second coat of resin set I covered the sections in river sand. Without the sand the dried resin would have been like a mirror on the back of the tank.

Stage 5
This shows the sections dried with the sand embedded into the resin. Excess sand was removed with a brush.
Stage 6
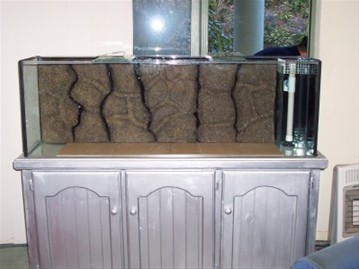
The sections were then siliconed into the back of the tank and left to dry. Use plenty of silicone as the styrofoam will be under great pressure to lift by the water.
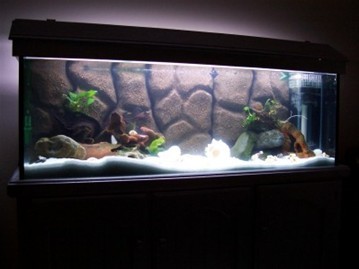
Stage 7
Tank installed, decorated and filled with water. Ready for the fish.
Total costs, sources & time
Parts and Labour.
Styrofoam Block (Clarke Rubber) $30.00
Epoxy Resin (Fiberglass (A/Asia)) $30.00
Silicone (Bunnings) $ 7.00
Black Oxide (Bunnings) $ 7.00
River Sand (20kg) (ANL) $ 8.00
Paint Brushes x 2 (Bunnings) $ 2.80
Buckets & Drop sheets (Bunnings) $ 3.00
Total $87.80
NB. This project is based on a 5ft tank. Other then the stryofoam block and silicone I had enough materials to do this job three times over.
The 5 day construction process was based on appox. 1 hour per evening. Total hands on labour is approx. 5 hours.
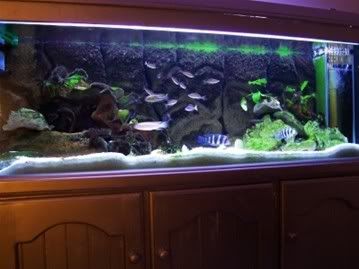
Same tank, several months on.


