Jump to content


Posted Image

PCS & Stuart M. Grant - Cichlid Preservation Fund - Details here


Photo

Juls 5ft 650l, 2nd Freshwater Reef Project Ground Up Diary Build Updated Sat 29th Jan 2011


  • Please log in to reply
47 replies to this topic

#1 Juls

Juls
  • Forum Member
  • Joined: 21-February 08
  • Location: Albany

Posted 10 July 2010 - 11:23 PM

The rain has forced me inside to finally start work on my new project, some of you will have seen my old setup, which this will replace, this will be my second attempt at what i call a "freshwater reef style aquarium" in that it will contain many different fish, including invertebrates. There will be no big shrimp muncher fish however!

It will take me a little while to get this going, but trying to do alot of it over the next few days while it's raining and i can't work.

Here is my previous 300L 4ft which is being gutted,

First Pic when i first set it up early this year,


Pic taken about 3 weeks ago of my 4ft, taken by dazzabozza. (thanks Daz) (4ft is being stripped to go into 5ft)


This is the new tank.. 5x2x2.5 650L


I'm a big fan of bevelled glass, particularily when you have to work on the tank alot.


I'm just washing the detergent out from cleaning silicon fingerprints ect off the new glass, you can see the 4x18x24 in the background, which is being gutted tomorrow. 4ft will be for sale next week.


And finally the background being fitted, this is as far as i got tonight. More updates tomorrow night!


Thanks
Juls

Edited by Juls, 29 January 2011 - 10:28 AM.


#2 Cawdor

Cawdor
  • Admin
  • Joined: 26-December 05
  • Location: Byford

Posted 11 July 2010 - 12:24 AM

Looks like a very interesting project, I love the background and the way it's hiding the gear.

#3 Kieran

Kieran
  • Forum Member
  • Joined: 28-May 09
  • Location:Fremantle, WA
  • Location: Fremantle

Posted 11 July 2010 - 01:38 AM

Looks AWESOME!!! The background is very impressive IMO. smile.gif

#4 dazzabozza

dazzabozza

    Life Member

  • Admin
  • Joined: 16-March 07
  • Location: Beeliar, Perth WA

Posted 11 July 2010 - 09:20 AM

What's gonna live behind the hidden section Juls? Will it also serve as a shrimp breeding ground / hideout?

Daz

#5 bradfitzy

bradfitzy
  • Forum Member
  • Joined: 14-April 07
  • Location: Balga

Posted 11 July 2010 - 10:54 AM

Love the work with the background...very professional looking job
Well done , cant wait to see this 1 up and running. welldone.gif

Brad

#6 Juls

Juls
  • Forum Member
  • Joined: 21-February 08
  • Location: Albany

Posted 11 July 2010 - 08:00 PM

The Middle part of the tank is purely to hide all the equiptment, this time i wanted nothing in the tank,

Initially i hadn't really intended it to be a place for shrimps to find refuge, although it had crossed my mind.

last week i saw my neon blues eating a shrimp, (and ferociously defending there catch too!)

Since then i barely saw any shrimps out and about, i assumed most of them eaten,

But today when dismantling the 4ft, i discovered i was completely wrong, not only where there as many shrimps as i had put in the tank in the first place, but probably almost double as many!!

most of them where hiding down the back corner where the filter inlet is, underneath the wood.

Consequently i spent about 4 hours slowly removing the shrimps from the tank before finally shutting it down.

Which put me back in the time line alot,

So to answer your question it will make a excellent shrimp refuge, as the larger fish will not be able to make it past the mesh, but all the shrimps should easily be able to creep in and out of the mesh.

Pics up in a couple of hours

Juls


#7 Juls

Juls
  • Forum Member
  • Joined: 21-February 08
  • Location: Albany

Posted 11 July 2010 - 09:29 PM

Update 11/07/10

First thing this morning I siliconed some foam down in the bottom of the tank, because there will be alot of rocks going in.
The tank has a 12mm ridge brace above the bottom glass, so it works well to hide the foam from view.


I also did some more siliconing and reinforced the weir where all the filter and heater gear will be hidden.
I added some more foam background behind the holes so it wasn't just white behind them, the holes will get covered up in due course,
but for the meantime i felt it helped a bit.


This is what the 4ft looked like this morning as i just started to work on it.


A hour or so later


Several more hours later,


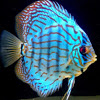
I had thought that my neon Blue rams had eaten all the shrimps, as I saw them killing one last week,
but Boy was i Wrong!! Unfortunatly this ment dismatling took till 4pm in order to catch all the shrimp, which where a nightmare to find,
as the water was cloudy, and i had to slowly lower the water level to slowly compress there range so i could find them.


after about 3 hours of shrimp catching, using a torch with the lights turned off in the tank (turned out to be the most effective way, easier to see/find and catch)
I got this little lot, if you call them $1 each the hourly rate isn't actually all that bad considering there must be about 200 shrimps in there..


Finally all the shrimps caught (maybe lost 50 juvies, but too dam hard to see/find)


All the rocks gone, added some gravel to mix in.


Gravel from both the 4ft, and my old 5ft discus tank added to the new tank.


Probably ended up with more gravel than i need, but i do need alot for what i'm planning, if you think that i'm just going to add plants now, well you better keep a eye on the thread over the next few days.


Ended up with a mixture of Seachem Flourite red, regular Flourite, Flourite Dark and Flourite Black... lol


Thats all for tonight,
thanks
Juls.


#8 Robbotheyobbo

Robbotheyobbo
  • Forum Member
  • Joined: 05-July 08
  • Location:Hammond Park W.A.
  • Location: Mars

Posted 11 July 2010 - 10:09 PM

looks great so far mate

#9 Angelo

Angelo
  • Forum Member
  • Joined: 07-May 09
  • Location: Morley

Posted 12 July 2010 - 12:05 AM

looking very impressive juls, cant wait to see the final setup

#10 nick05

nick05
  • Forum Member
  • Joined: 02-January 09
  • Location: Duncraig

Posted 12 July 2010 - 04:05 PM

Am enjoying following this journal.. good work smile.gif

#11 Juls

Juls
  • Forum Member
  • Joined: 21-February 08
  • Location: Albany

Posted 13 July 2010 - 06:49 PM

todays update,
things have been progressing slowly, but it's important i'm careful while building or the whole thing won't be long term.

Firstly, some of my fish waiting for there new home,


Had to remove most of the gravel, to start building, last time i built it all in there, decided to add as i go might be easier.


Some of the rocks to be used (there is alot more i ended up using also)


First Level.


Now filled in.


Second level


Washing the gravel in as i go is critically important, any air pockets will cause the gravel to slowly recede downwards over time, destroying then entire structure within months.


3rd Level in,


4th and 5th in progress, as far as I got today.


#12 joe23

joe23
  • Forum Member
  • Joined: 11-June 10

Posted 13 July 2010 - 06:59 PM

where do you get the rocks from?

the tank looks awesome

#13 dazzabozza

dazzabozza

    Life Member

  • Admin
  • Joined: 16-March 07
  • Location: Beeliar, Perth WA

Posted 14 July 2010 - 06:34 PM

Can't wait to see how the moss fills out on the bottom row of rocks. Does the fishing line stay in there forever?

Daz

#14 lojik

lojik
  • Forum Member
  • Joined: 18-June 09
  • Location: ashfield

Posted 14 July 2010 - 06:51 PM

Judging from your original setup, I predict this will be truly awesome when done smile.gif

#15 Juls

Juls
  • Forum Member
  • Joined: 21-February 08
  • Location: Albany

Posted 14 July 2010 - 08:07 PM

QUOTE (dazzabozza @ Jul 14 2010, 09:34 PM) <{POST_SNAPBACK}>
Can't wait to see how the moss fills out on the bottom row of rocks. Does the fishing line stay in there forever?

Daz


I normally use black cotton, but this time decided to use fishing line as i thought it would be less visable, kinda regretting not using cotton now, and will use cotton for the rest of the build.

normally i leave the cotton in place forever as the moss hides it,
however I most likely will cut and remove the fishing line once the moss takes hold of the rocks.

Juls


#16 Juls

Juls
  • Forum Member
  • Joined: 21-February 08
  • Location: Albany

Posted 17 July 2010 - 09:21 PM

Ok, got a bit further today, still a long long way to go yet, but alot of the bitchy stuff is done.

When i started this morning


Late in the day


After Visiting Darren Bennets to buy some lilaeopsis novaezealandiae. (thanks Darren!)


Thats all for tonight,
Juls

#17 Warby

Warby
  • Validating
  • Joined: 15-January 09

Posted 19 July 2010 - 10:04 AM

Looking very good so far Juls, original and well thought out.. Can't wait to see it all said & done smile.gif

#18 Juls

Juls
  • Forum Member
  • Joined: 21-February 08
  • Location: Albany

Posted 19 July 2010 - 09:38 PM

Well got most of the lights going tonight,

still havn't done the filter setup, (just a temporary running on it atm) or the water exits yet,
after that i'll be ready to add fish, still got more moss to add to the walls ect as yet, not leaving them bare, have to hide that ugly bit in the middle with moss,
but will sort that out in the coming days.


Still got more moss to add yet, and a huge amount of growing to do.


#19 Juls

Juls
  • Forum Member
  • Joined: 21-February 08
  • Location: Albany

Posted 20 July 2010 - 11:41 PM

BTW, if anyone could help me out with even just a few stems of pogostemon helferi I would be greatly appreciative!
Happy to buy them.

Juls

#20 the pulpican man

the pulpican man
  • Forum Member
  • Joined: 08-January 09
  • Location: Perth, Western Australia

Posted 21 July 2010 - 02:07 PM

That looks awesome Juls!! keep us posted smile.gif


0 user(s) are reading this topic

0 members, 0 guests, 0 anonymous users